Dear Readers: HWS has recently started a new project for the students of engineering ====> The Engineering Projects


Write at HWS !!!

Guest Posting

How secure is your Computer ?

Check out your computer safety here . A lot of tools , tricks and hacks related to computer .

Blogger Tips and Tricks

A Lot of tips ,tricks and hacks related to blogger . Seo tricks to get maximum targetted traffic to your blog.

Easy ways to Earn Online

Online earning is not so difficult but it needs a lot of patience and hardwork. Here are some techniques to earn money through internet.

Facebook Tricks

A lot of facebook tips , tricks and hacks.It requires a lot of time but reading is must.

Pro Hacking

If you have knowledge about basic techniques then try this,but be careful as it is highly toxic.

Showing posts with label Email hacking. Show all posts

Friday, February 3, 2012

Undo Sent Emails in Gmail

Did you know you can undo a sent e-mail in Gmail? It’s a lesser known feature, but Google just made it even better than it was before. When it first launched, you were given a 5-second window during which you could hit “undo.” Now that’s up to 30 seconds, Google Operating System Discovered.
The feature is hidden from most users who don’t know where to look, so here’s a quick guide to avoiding social and workplace faux pas with the click of a button. Be aware that the feature is part of Gmail Labs, though. That means it’s still in testing and it might not always work as intended.
  • Go to Gmail Lab
Since the Undo Send feature is part of Gmail Labs, you’ll have to navigate to the Gmail Labs page to activate it. Load up Gmail and look in the top-right corner of the page. Between your e-mail address and Settings you’ll see the green Labs icon. Give it a click.
  • Enable “Undo Send” and Save Your Change.
 You’ll be presented with a list of features Google is testing in Gmail. Some are very useful and some are just fun. We’ve gone into more depth on all Gmail Labs has to offer in previous articles, but this time we’re here just for the Undo Send feature.You’ll usually find it close to the bottom of the list. We’ve included a picture of it above so you know what you’re looking for. Just select Enable then scroll down and save your changes.
  • Customize Undo Send’s Duration
 By default, Gmail gives you a 10-second window of time in which you may undo a sent e-mail. You can change that to five, 20 or 30 seconds by going to Settings (in the top right corner of the main Gmail page, right next to the Labs icon) and finding the Undo Send section inside the “General” tab.

There you can enable or disable Undo Send and change the duration with a drop-down selection box as pictured above.
  • Write and Send Your E-mail
 Now that Undo Send is enabled, it works each time you send a new e-mail. You don’t have to do anything unusual beforehand to make it possible to use Undo Send with that e-mail.
  • Click the “Undo” Button After You Send
 Now you have either five, 10, 20 or 30 seconds to undo your sent e-mail, depending on what you selected under Settings.As soon as you hit Send, a subtle line of text will appear above your Inbox saying “Your message has been sent.”

It will be accompanied by a few extra options. Among them is “Undo.” Click that within the allotted time and your faux pas will be prevented.Note that you can hit “Z” on your keyboard, the Gmail shortcut for undo.

Just don’t navigate away from or close this page, because once you do, you’ll lose the opportunity to undo your sent message forever.
  • “Sending Has Been Undone”
You’ll immediately be taken back to the e-mail composition page, and your e-mail will be in draft form, unsent and ready for further editing — or deletion, if writing it was ill-advised to begin with!

Monday, October 17, 2011

Receive Messages Without Giving Out Your Email Address

whspr logo
Somebody asks for your email address and you don’t want to give it. What will you do? Whspr is a free service that lets you receive messages from people without giving out your email address to them.This is how it works:
  • Go to their website.
  • Fill the form, and they will give you a small easy-to-remember URL which you can share in place of your email address. 
  • When viewers go to this URL, they will see a message form, which once filled will be send to Whspr‘s server and they will forward it to you. It’s that simple.

creating whspr acccount


  • Below is the confirmation that the URL has been created, they email you a link to the confirmation page in case you forget your URL, you can delete your URL from confirmation page anytime you want.
whspr created
  • And this is how Send Message form looks like when you visit the URL.
send message without giving email
Enjoy!

Sunday, September 11, 2011

Hack Tagged.com password with fake login page

One of my blog users had requested me for a Tagged.com fake login page,It is quite difficult than Facebook fake login page OR Orkut fake login page,but i will make this tutorial easy to understand by post step by step method to create a tagged.com fake page and hack Tagged.com passwords.

Procedure


  • Download Tagged Fake Login Page 
  • First of all extract the files that you downloaded 
  • You will see three files in it : Login.php,Tagged.htm,LoginFrame.htm,LoginFrame2.htm 
  • Now "Right Click" on LoginFrame2.htm and click on "Edit" or else Right Click > Open With > Notepad. 
  • Then you will find something like this: There has been a temporary error Please Your Redirection URL (tagged.com)" target="_blank">Try Again 
  • So,now your main objective is to upload the files into a free file hosting server like www.110mb.com , www.t35.com,www.ripway.com 
  • So just create an account in any of the above sites (i prefer 110mb.com because it is much easier) 
  • Now just get into your file manager

Saturday, September 3, 2011

[Requested]Make Your Own Phishing Site

Hello Friends,Tired Of Searching For Those Phishing Files.How About Making Your Own Fake Page Of Any Site In Just Few Steps.Actually One Of My Friend Asked Me About htis On Facebook And Then He Asked In Request Zone That's Why I Am Posting This Tutorial.Here Is The Tutorial, Follow All The Steps Carefully And If You Have Any Problem At Any Point,Ask In The Comments And I Am Here To Resolve Them :
  • First Things First You Must Choose The Site Which You Wanna Make A Phisher Form.
  • When You Found Your Site Right Click On It And Say "view source" And Save It On Desktop As index.html
  • Open The "index.htm" With Notepad And Press CTRL+F And Type action. You Should Find A Command Looking Like This form action="RANDOM URL" method="post"
  • Change The Link After Word Action To write.php And Change The Word Post To Get, Which Is Close To The Word Method.
Note : Remember Dont Erase The Inverted Commas And Commas It Might Affect The Page
  • Save index.html
  • The Code For Write.php File


  • Save This File write.php, And Upload It To The Subdomain Aswell
  • Test Out Your Website. Type In Something In Your Phishing And Then Go To Filemanager And Open The Password File, What You Wrote Should Be Typed Here!,

ENJOY!!!!

Tuesday, February 8, 2011

How To Find The IP Address Of The Sender In Windows Live Mail, Gmail Or Yahoo! Mail

Whenever you receive an email, you receive more than just the message. The email comes with headers that carry important information that can tell where the email was sent from and possibly who sent it. For that, you would need to find the IP address of the sender and this is how you do it.

Windows Live Mail

Log into your Windows Live Mail account with your username and password,Open the inbox.  To display the headers, right click on the email message in the Inbox, and select View Source.

view source

This will open up a new page with a detailed header content.

source
Now look for Received: from followed by IP address within square brackets
ip

If you have multiple Received: from headers, eliminate the ones that have proxy.anyknownserver.com.

Gmail

Log into your Gmail account with your username and password, Open up the mail. To display the email headers, Click on the Reply drop down box and select Show Original.


 show original

Look for Received: from followed by the IP address between square brackets [ ].

show original

If you find more than one Received: from patterns, select the last one.

Yahoo Mail

Log into your Yahoo! mail with your username and password, Click on Inbox or whichever folder you have stored your mail, Open the mail. If you do not see the headers above the mail message, your headers are not displayed. To display the headers, click on the drop down Standard Header box and select Full Header.

yahoo

Look for Received: from followed by the IP address between square brackets [ ]. If there are many instances of Received: from with the IP address, select the IP address in the last pattern. If there are no instances of Received: from with the IP address, select the first IP address in X-Originating-IP.

full header

I hope this post will help you finding the IP address of the sender, do let us know what you think by leaving a comment.

Monday, December 20, 2010

keylogger to hack password - Aradamax keylogger

Ardamax Keylogger is a keystroke recorder that captures user's activity and saves it to an encrypted log file.This log file then can be used to hack anyones email account password or any computer password. The log file can be viewed with the powerful Log Viewer. Ardamax keylogger is easy to use and install. Use this tool to find out what is happening on your computer while you are away, maintain a backup of your typed data automatically or use it to monitor your kids. Also you can use it as a monitoring device for detecting unauthorised access or one can use this tool to hack someones hotmail, gmail, yahoo, msn or other email account password.

Ardamax keylogger tutorial

This tutorial will help you in installing Ardamax keylogger for hacking passwords. Remember, ardamax keylogger is detected as hacktool (virus) by most antivirus. So, dont forget to crypt and bind your keylogger file. If you have any problem in using Ardamax keylogger to hack email passwords, please mention it in comments


This invisible spy application is designed for Windows 98, ME, NT4, 2000, XP and 2003.

Ardamax Keylogger Features:

  • Remote Installer - creates a customized Ardamax Keylogger engine file. You can email this file to your target for remote monitoring.
  • Invisible mode makes it absolutely invisible to anyone. Ardamax Keylogger is not visible in the task bar, system tray, Windows 98/2000/XP/2003/Vista Task Manager, process viewers (Process Explorer, WinTasks etc.), Start Menu and Windows Startup list. 
  • Email log delivery - keylogger can send you recorded logs through e-mail delivery at set times - perfect for remote monitoring! 
  • FTP delivery - Ardamax Keylogger can upload recorded logs through FTP delivery. 
  • Network delivery - sends recorded logs through via LAN. 
  • Clipboard logging - capture all text copied to the Windows Clipboard. 
  • Visual surveillance - periodically makes screenshots and stores the compressed images to log. 
  • Chat monitoring - Ardamax Keylogger is designed to record and monitor both sides of a conversation in following chats:
  1. MSN Messenger, Windows Live Messenger
  2. ICQ Pro, ICQ Lite
  3. Skype
  4. Windows Messenger
  5. Google Talk
  6. Yahoo Messenger
  7. Miranda
  8. QiP
  • Security - allows you to protect program settings, Hidden Mode and Log file. 
  • Web Update - Ardamax Keylogger can check the availability of updates, download and install them automatically. Thus, the latest version of Ardamax Keylogger will always be installed on your computer. 
  • Application monitoring - keylogger will record the application that was in use that received the keystroke! 
  • Time/Date tracking - it allows you to pinpoint the exact time a window received a keystroke! 
  • Powerful Log Viewer - you can view and save the log as a HTML page or plain text with keylogger Log Viewer. 
  • Small size – Ardamax Keylogger is several times smaller than other programs with the same features. It has no additional modules and libraries, so its size is smaller and the performance is higher. 
  • Unicode Support - Ardamax Keylogger fully supports Unicode characters which makes it possible to record keystrokes that include characters from Japanese, Chinese, Arabic and many other character sets. 
  • Keystroke Recording - It records every keystroke. Captures passwords and all other invisible text.

Other Features:

  • Windows 2000/XP/Vista support
  • Monitors multi-user machines
  • Automatic startup
  • Friendly interface
  • Easy to install

Download Ardamax Keylogger

Code:

Name: nGen 2oo6
Key: RTHUUGQVAWDFOQT


Now read this post to Hack into Someone's PC Using Keylogger .

Tuesday, October 13, 2009

How to hack a photobucket account

Photobucket Hacking is now at its height as it is one of the most popular Free image hosting site.There are two methods to hack a photobucket account:
  • Phishing
  • Keylogging


Keylogging - The easy way


Keylogging is the most easy way to Hack a Photobucket account,A keylogger is a small spy program that monitors each and every keystroke that a user types on a specific computer’s keyboard.It can also record screenshots,Videos,webcam depending on the quality of your Keylogger.To use a keylogger you doesn’t need to have any special knowledge. Anyone with a basic knowledge of computers can use keyloggers. With my experience I recommend the following keylogger as the best to hack Photobucket.


  • SniperSpy


How can i Use Sniperspy for email hacking?

Remote password hacking software 
Its very easy to use sniperspy,a person with basic knowledge of computer can use and operate sniperspy:

1.First you need to purchase sniperspy.
2.After the order is complete, you will be instantly emailed a receipt with your Username/Password and a link to download the Module Creator program. You will download this program to your local computer in order to create the module to send to your remote computer.
Run the module creator program and enter your Username/Password into the fields. Then follow the screens to adjust the settings to your needs. Once the module wizard is finished, your module EXE file will be created in the location and name you selected. Some people choose unique names for the module such as funpics.exe or Anything.exe.
3.Once you have got sniperspy installed into victims Computer,you will receive logs,screenshots etc over periods,You can login into your sniperspy account to see the screen shots,logs and email passwords 

Is my Order 100% safe?

Yes.All orders of Sniperspy are handled by plimus which is a very well known and popular company.The privacy and protection of your online order is 100% safe.you can give order with worrying about scams

Will the victim know about it if i install sniperspy?

No.Its almost impossible to know about it,because once sniperspy is installed into victims computer it runs in a total stealth mode,it hides it self from Startup,taskmanager add/remove program and Program files.

What do i do if Antivirus catch me ?

If you are afraid that antivirus might catch you than read my post on How to bypass antivirus detection of keylogger.

Can i be traced Back if i install it on someones computer?

No.Its almost impossible to be traced back if you install sniperspy on someones computer


If i dont Have phisical acess to victims computer can i still install sniperspy?

Yes.You do not need physical access into victims computer to install a sniperspy or winspy you just need to make victim install a small remote file after which you will be recieve password,screenshots,logs etc over periods 

Which is Best sniperspy or winspy?

I recommend Sniperspy for the following reasons:
  • Sniperspy is Fully compatible with windows vista,but winspy has known compatible issues with Windows vista.
  • It has low antivirus detection rate.
  • It can bypass firewall.
  • Sniperspy is recognized by CNN,BBC,CBS and other popular news network,Hence it is reputed and trustworthy.
  • Sniperspy is completely reliable and user-friendly,It is worth price that you pay for it,you cannot get a better keylogger than this,So what are you waiting for?Go grab the Sniperspy now

Phishing


Phishing is the most commonly used method to hack Photobucket. The most widely used technique in phishing is the use of Fake Login Pages, also known as spoofed pages. These fake login pages resemble the original login pages of sites like Yahoo, Gmail, MySpace etc. The victim is fooled to believe the fake Myspace page to be the real one and enter his/her password. But once the user attempts to login through these pages, his/her Myspace login details are stolen away. However phishing requires specialized knowledge and high level skills to implement. So I recommend the use of keyloggers to hack myspace account since it is the easiest one.

Tuesday, September 29, 2009

How to bypass antivirus detection of keylogger

In my previous post "Which spyware keylogger to choose" i told you about best keyloggers and spywares availible now a days to hack email accounts,but after that i received huge amount of email and readers asked me that is there any way to avoid antivirus detection while installing a keylogger remotely.so today i will tell you about a software,by which you can bypass antivrus detection while installing a keylogger remotely

How to bypass antivirus detection - UD Crypter

This Crypter is UD (Undetectable) and not FUD (Fully Undetectable) free software, because it is detected by Avira antivirus and even Kaspersky antivirus as virus. Hence, it is 2/22 UD ie only 2 antiviruses out of 22 detected this as virus. Thus, if your victim is using any antivirus other than Avira and Kaspersky, then chill out guys.. here's the solution for your problem.

Download UD Crypter software:

As I have explained previously, Crypter is used to bypass antivirus detection on victim computer. So, we use Crypter software to encrypt our Keylogger and trojan. Due to encryption by Crypter software, whenever victim runs our sent keylogger or trojan on his computer, his antivirus does not detect our keylogger as virus and our keylogger is prevented from being deleted on victim computer.
  • First of all Download the software. 
  • Extract the Zip file to obtain FUD Crypter free software.
  • Run Krypter.exe application on your computer system.
  • Now, browse to the file (keylogger or any trojan) you wanna crypt to bypass antivirus detection and hit on "Encrypt".
  • A new file will be created in same directory. Now, scan this file with your antivirus and it will not detect any virus (except Avira and Kaspersky).
Note: You may get certain error on your computer like this:
UD crypter
  • If you are getting this error, install Library file package to fix this error.(Try googling)
  • I hope now your are able to use this UD Crypter to crypt keylogger or trojan and bypass antivirus detection

Sunday, September 27, 2009

Hack your friends account password

Learn to hack your friends acount password
well THis trick will only work if your friend has saved his password, it allowes you to have a look at all the Username and Password which your friend had asked my computer to remember which also included my Internet Username and Password. But this is only possible in Mozila Firefox and google chrome


Hack your friends account password


To Hack your friends Password you only need even less than a minute and you can have a quick look at your friends Usernames and Passwords.

Just follow the steps:

For Mozila Firefox:

1.Open Mozila Firefox

2.Goto Tools -> Options

3.In that goto Privacy -> Passwords.

4.There you will find View Saved Passwords Button Click on it.

5.It will show you a list of websites with the usernames. To get the Passwords Click on Show Passwords Button.

6.Now To get the Internet Password Just see for any IP address in the website column this is the Ip address of that computer and Username and Pass is what you want.

7.You can get pass of any account just look for the site name whose password you want to hack and on the right side you will get the Username and Password

For Google chrome:

1.Open Google chrome

2.Goto settings -> Options

3.Goto Personal stuff -> Show saved passwords

So in this way you can hack your friends account password


.......

Friday, September 25, 2009

How to install a keylogger remotely

In my last post keylogger to hack password:aradamax keylogger i told you about aradamax keylogger and its features.I was asked by many of my readers that "How to install a keylogger remotely" well today my post will give you complete information on How to install a keylogger remotely
Note:If you want to attach the keylogger to an existing file, go ahead and place that on your desktop.

How to install a keylogger remotely - Method

A step-by-step guide to successfully creating a deployment package, sending it, and receiving information using Ardamax Keylogger. Now, in this guide, I only use one method of receiving information, and that's an FTP. I also do not protect the files. Any suggestions and comments are appreciated.
  • Download Free aradamax keylogger to hack password 
  • Now, open it, and it should give you a name and a jumble of letters and numbers.
  • Go back to the Ardamax icon at the bottom right, and right-click it.
  • Click the "Enter Registration Key" button.
  • Now enter this code to unlock full version:

Name: nGen 2oo6
Key: RTHUUGQVAWDFOQT

  • Or if you choose another version of aradamax keylogger then get serial from The Serials 
  • Now you are ready to install keylogger remotely. 
  • Again, right click the icon at the bottom-right.
  • Click "Remote Installation".
  • Click next.
  • Now, if you want to attach your keylogger to an existing file, tick the box that says "Append keylogger engine to.." etc.
  • If you tick it, click Browse, and select the file.
  • If not, continue down. The installation folder on target computer needs to remain Windows System Folder for added security, so leave it be.
  • Add any additional components you would like. I just leave mine as "log viewer".
  • From this point, click next.
  • Tick all of the boxes, as to hide it from everything visible, otherwise they can just see it and be like "Wtf", uninstall, etc.
  • Click next.
  • For Security, do what you want. I leave all of it as-is and click next again.
  • Now, untick the "Check for updates" box, else it will check for updates on their computer and they will know that they are bugged.
  • Click next.
  • Tick the "Start in hidden mode" box, and leave the "Run on windows startup" as-is.
  • You may pick a date to self destruct, if you like. Sounds noisy,It simply removes itself on selected date. If not, leave it alone, and it will never self destruct.
  • Click next.
  • Tick the "Send logs every.." box, and choose how frequently you would like to recieve information that has been sent.
  • Select 'FTP' and de-select everything else as a delivery method.
  • You may choose to take out screenshots.
  • Leave log format alone.
  • You may choose to send logs if it exceeds a certain size, or if you want it to send no matter what, untick the box, which is what I do.
  • Click on next. 
  • Head on over tohttp://phpnet.us/ 
  • Make an account,entering your username password etc.
  • Save your FTP Account name and password. You'll need it in a moment.
  • This site will be the site that holds all information recieved by the keylogger.
  • When you're done, scroll down a bit.
  • Under "FTP Accounts", click "File Manager".
  • Near the top, click the "New Dir" button, and create a directory by any name you want.
  • Now, hold that thought. Bring the keylogger back.
  • In Ftp Host, put in ftp.phpnet.us
  • In "Remote Folder", put in the new directory's name you made.
  • Fill in your Username and Password.
  • Leave leave Passive Mode checked
  • Leave port alone as well. It's default.
  • Now to make sure everything is correctly done, click test. It should tell you it all went through. And to double check, you can refresh your open window. Click your directory and there should be a test file in it.
  • Click next 
  • Tick anything and everything you want.
  • Click next 
  • If you selected screenshots to be enabled, pick how you want them delivered. Click next. If not, ignore this step.
  • Browse where you want the keylogger to be placed. You can also change the icon, which is nifty.IF you are sharing a picture with your friend of yours,you can change the icon to a notepad and name it "Funny pic" or some thing else,and they fal for it.
  • Click Next.
  • This screen will go over with you everything that you have chosen. Make sure it's all correct.
  • Click Finish. 
  • Now, if you appended the keylogger to something, you're going to need to put the "install" and appended file into a .zip or .rar file.
  • If not, you have the simple "Install" on your desktop. Also, feel free to rename it to something like "OMFGFunnypicture!!!.jpg"
  • Now you are ready to install a keylogger remotely. 
  • Upload the file or .rar/.zip somewhere, and let your target download it. They will double click it, and on their end, nothing will happen, but secretly, they have been keylogged.
  • Check your FTP Directory that you made as frequently as you told it to send logs, and you'll have everything you need.
  • That's all . Hope you guys like it.

Thursday, July 2, 2009

How to create Fake login page for any website


Fake login page

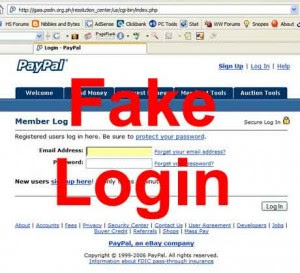
A Fake Login Page is a page that exactly resembles the original login page of sites like Yahoo,Gmail etc.However, these Fake login pages are created just for the purpose of stealing other’s passwords.


Update:Jotform.com have changed their policies so you cant make fake page without a premium account.I have posted an updated version in my post "How to hack gaiaonline accounts"

In my last post hack yahoo using fake login page i showed you to create fake login page of yahoo..
But i was asked by many others that what about other sites, HOw would i create fake login page for other sites such as orkut,facebook,myspace,gmail and etc


So in this post i will show method to create Fake login page for desired site:


How to create fake login page - Procedure?


Now it's easy to build a Fake Login Pages without any knowledge of Programming Languages. One can use http://www.jotform.com to build the Sign Up page.


{1} Open www.jotform.com and Sign Up.
{2} then Login there with your newly registered account.
{3} now click on ‘ Create your first form’.
{4} Now delete all the pre-defined entries, just leave ‘First Name:’ (To delete entries, select the particular entry and then click on the cross sign.)
{5} Now Click on ‘First Name:’ (Exactly on First Name). Now the option to Edit the First Name is activated, type there “username:” (for Gmail) or YahooId: (for Yahoo)
{6} Now Click on ‘Power Tool’ Option (In right hand side…)
{7} Double click on ‘Password Box’. Now Click the newly form password entry to edit it. Rename it as ‘Password:’
{8} Now Click on ‘Properties’ Option (In right hand side…). These are the form properties.
{9} You can give any title to your form. This title is used to distinguish your forms. This Title cannot be seen by the victim.
{10} Now in Thank You URL you must put some link, like http://www.google.com or anything. Actually after entering username & password, user will get redirect to this url.(Don’t leave it blank…)
{11} Now Click on ‘Save’. After saving, click on ‘Source’ Option.
{12} Now you can see two Options, namely ‘Option1′ & ‘Option2′. Copy the full code of ‘Option2′.
{13} Now open Notepad text editor and write the following code their.
Paste the Option2 code here
{14} And now save this as index.html. And then host it, mean you will have to put it on the internet so that everyone can view it. Now i think that you would be knowing it and if in case you do not know it please leave a comment with your email-id and i will mail you how to do it.
Now you can view it by typing the url in the address bar.


NOTE: If u want to send it to the internet, then first you will have to create a hosting account which you can create on www.110mb.com and there are many other sites which you can find on the internet very easily.
I suppose that you created your account at 110mb.com
now login to your account then click on “File Manager”, then click on “upload files” or just “upload”. Then select the file which you want to send to the internet and click on upload. And you are done.
Now you can access you file on the net by just typing the url of the file.
And you will receive password of the users that login to your site through email-id which you’ve entered while creating the form.


Thats how you can create fake login page for your desired site,hope you enjoyed the post 

Twitter Delicious Facebook Digg Stumbleupon Favorites More


Recent Posts

Join Me On Facebook

700+ Followers

Followers


meet women in Ukraine contatore visite website counter
DMCA.com

Recent Comments

Follow Me On Twitter

1112+ Followers