Dear Readers: HWS has recently started a new project for the students of engineering ====> The Engineering Projects


Write at HWS !!!

Guest Posting

How secure is your Computer ?

Check out your computer safety here . A lot of tools , tricks and hacks related to computer .

Blogger Tips and Tricks

A Lot of tips ,tricks and hacks related to blogger . Seo tricks to get maximum targetted traffic to your blog.

Easy ways to Earn Online

Online earning is not so difficult but it needs a lot of patience and hardwork. Here are some techniques to earn money through internet.

Facebook Tricks

A lot of facebook tips , tricks and hacks.It requires a lot of time but reading is must.

Pro Hacking

If you have knowledge about basic techniques then try this,but be careful as it is highly toxic.

Showing posts with label Blogging. Show all posts

Friday, November 18, 2011

Chapter 5 : Give Your Comment Form a Professional Look

Hello guys ,hope you all are fine and enjoying good health .First thing I was busy that's why posting this chapter so late. In our previous posts we have learn about How to Make your Blog Post Attractive and then we checked Widgets and Add-ons essential for blogger . After these two posts we are now done with the template as we have customized both the posts and the widgets. Now the only remaining part on the blog is Comment portion. So in this chapter we will learn how to customized a comment system which is actually very important as the visitors usually judge the popularity of a post with its number of comments.

Blogger Comment System

Blogger Comment System is very poor as compared to wordpress or joomla.If you check comment system of wordpress then u will really say that its looking a professional site but in case of blogger its just a simple notepad type and today in this chapter we will try to make it as best as we can.Follow the bellow steps to customize it.

a) Customize Blogger Comment form :

  • First of all follow this tutorial step by step to Customize Blogger Comment Form & Make It Attractive  
  • Now the most important thing choose that comment form style which is similar to your blog style.
  • Like in our blog HWS you have seen that the comment border color is as same as the color of headings or the color of links.
  • But the problem is how to change the color of borders etc to make it similar to your blog color, for this I have completely mentioned in above tutorial which color is doing what and with the help of  this tool HTML Color Code Generator you can easily get your desired color.
  • You have also seen that comment system on HWS gives a professional look so just follow this tutorial and make your comment system as same as mine .

b) Change Author Comment Color :

  • Next thing is author's comment , dont you think that author's comments must be different from the visitor comments.
  • When a new visitor comes to your post and he finds something difficult he immediately moves to the comments to check whether someone else asks about it or not and when he can easily see the admin's comment then it will be a relief for him as now he doesn't need to read all the comments ,he just read the author's comment to find solution to his problem.
  • Now how can you change the authors comment style.Read this tutorial and Change Author Comments Color Style In Blogger quite easily.
  • You can also make changes to this code . Just play with the code and get your desired color for author's comment with the help of  HTML Color Code Generator 
  • But again the same thing try to maintain the flow of your blog , as in HWS the author's comment color is again sky blue .... :))
  • I know these are very minor things but these minor things bring a great impact. Trust me ......

c) Add a note above

d) Add a reply button

 That's it for today but I have missed one thing here which is how to add a reply button on each comment ,I will post about it soon and then will add it to this chapter. Your feedback is really important so that I may write the next chapter ...... Take care :))

Wednesday, November 16, 2011

Increase Twitter Followers Using Twitter Hashtags

I have already posted about Get Huge Traffic from StumbleUpon to Your Blog / Site. Now I am posting about twitter as these bookmarking sites are a great source of traffic to your blog.Twitter is a very popular site and a great source of traffic for the blogger and site owners but mostly people don't know how to increase Twitter followers to get traffic and also not many people understand what about twitter hashtags and how a hashtag can help a blogger and website owners to boost the traffic to their twitter profile and hence ultimately to their blogs and websites.Twitter hashtags or a hashtag in a tweet is not more than a word with a symbol hash (#) prefixed to it which makes it really strong e.g. #twitterfollowerbutton, #facebook, #HackWithStyle. These hashtags are actually serve as a search keyword for that particular tweet and hence when twitter users want to find any tweet they help them finding it faster than normal tweet.

How to use twitter hashtags

  • Let us understand this concept with the following tweet as an example :
Increase Twitter Followers Using Twitter Hashtags .
  • Above tweet is a normal tweet without twitter hashtags. Now, lets add hashtags to it in the bellow tweet.
Increase Twitter Followers Using Twitter Hashtags. #Twitterhashtags #Twitterfollowers #HackWithStyle.

The second tweet is same as the first tweet except we have added three words (hashtags) “Twitterhashtags”, "Twitterfollowers" and “HackWithStyle” with hash (#) symbol prefixed. Even though the tweet being conveyed is still the same and with the exactly same words but second tweet will be far easier and faster to find when someone tries to search. Anyone trying to search with the keyword Twitterfollowers or Twitterhashtags will be able to easily  find the second tweet than the first one. Hence, more number of visitors reaching to your tweet and reading your tweets and profile. This will obviously increase number of twitter followers and will ultimately lead to large number of visitors to your website or blog.
NOTE : Currently, there is a limit of maximum 3 hashtags in a single tweet, however, you should always refer and check with twitter’s latest guideline on the same so that you don’t intentionally or un-intentionally violates the same.

Sunday, November 13, 2011

List of Best Video Streaming Websites to get Backlinks

In my previous post I have told about How to get Traffic from StumbleUpon which is also a part of SEO and today we will discuss about backlinks.Getting Backlinks is an essential task for a blogger and its really a very difficult task too.There are many ways to get backlinks and here I am showing one of them which I think is the best of them.I have collected numerous video sharing websites, where you can Upload videos for free to get backlinks.

Steps to Follow

  • First of all Create a video for your website.Its not much difficult ,you may use Camstudio software to create video.
  • Now upload this video to all the websites listed below.
  • In the description box , must add the link of your blog or site.
  • Moreover after logging in,edit your profile and you will see there is an option of website ,put your link there.

Benefis

  • You will get backlinks very easily which will increase your page rank.
  • Secondly these videos will also send remarkable traffic to your site depending upon how good your video is.
  • In Forums we mostly have to wait to add link in our signature but here no need to wait just create account and put your link.

List of Best Video Streaming Websites

Below is the list of best video streaming sites :
NOTE : If any of these links is not working then copy paste it in your url and do let us know so that we may correct it.Your feedback is welcome.

Saturday, November 12, 2011

Advertise With Us

Now that we are averaging over 2000 unique visitors/day to our blog, we have decided to open up some space for carefully selected Site Owners. All ad revenues will be applied to the costs of maintaining HackWithStyle , as we are soon going to open FORUMS for our users and we are also thinking of starting some contests for the hackers. Provided below are our ad acceptance policies and current rates:
  • We reserve the right to accept/ reject ads according to our editorial policies.
  • We commit to displaying the accepted ad at the right place and for the duration promised.

How to Advertise With Us ?

  • Fill the below simple form and choose your package and click SUBMIT.
  • We will review your form and will contact you within one working day on your email. Make sure the Email is correct.
  • After that you have to send the money through any way you like e.g. PayPal, alert-pay etc.
  • If you have any message for us then write it in the message box although its not compulsory.
  • Now fill the below form :

NOTE : We will Contact you within 1 working day through your email.

Types of Ads

Further info about the add locations.We can provide different kind of add spaces on our website and their detail is as follows :

1) Ads Above Posts :

These ads willl be posted above each post and these will be the most click able ads.
  • Size of the banner : 125x125
  • Rate : $40/month

2) Right Column ads:

These ads will be displayed in the right  column of our blog starting from the top. You have to provide us the logo of your site and we will link it to your homepage.
  • Size of the banner : 125x125
  • Rate : $25/month

3) Footer Ads:

The footer ads will be in the form of a clickable image or a text box with product description and a web address.
  • Size of the banner : 125x125
  • Rate : $15/month

How to Upload / Host Javascript Files in Blogger Itself

Today I am going to explain how to host JavaScript(.js) files in Blogger. "How to host JavaScript files for Free with unlimited bandwidth in Blogger ?" is one of the most frequently asked questions in the blogger community as blogger has no option to upload files.You may find a lot of online hosting providers out there which can help you host your .js files for free, but the problem always arises while doing this is all have some bandwidth limitations and secondly they are also not very reliable.

So, if you are also facing this king of problem, here is a simple trick.Just follow he below steps carefully :

Steps To Follow

  • Suppose I have three JavaScript files which I have to upload on Blogger.
  • First of all open these files in WordPress.
NOTE : Don't open them in Notepad ,only use WordPress.
  • Now press Cntrl+A and copy all the code in the file.
  • Now paste the code you copied from the file file in your blogger template as shown below :
<script type='text/javascript'>

//<![CDATA[

PASTE THE JAVASCRIPT CODE HERE

//]]>

</script>


  • Now if you have more than 1 JavaScript file. Here's also a solution for that problem.Just repeat the process again... like this..
  •  And now the Last and Most Important step... SAVE THE CHANGES ;))

Benefits of this trick:

  • No limitation for file size
  • No bandwith limitations
  • Super fast page loading (as blogger itself is hosting the file)
Don't forget to make comment ..... :))

Wednesday, November 9, 2011

Get Huge Traffic from StumbleUpon to Your Blog / Site

StumbleUpon is a very popular social bookmarking website which drives loads more traffic to your site.Mostly people don't know what StumbleUpon is. Its a simple bookmarking site used to bookmark your pages.It helps you to discover and share great websites. By using StumbleUpon’s browser toolbar, you can connect with stumblers those who are interested to your topics and share your information. This social bookmarking website gives you pages that others, with the same kinds of interests, have highlighted in their searches.
For Instance : If you’re someone who enjoys reading information on internet tools topics, then you would be shown places to check out that contains internet tools information.

SignUp for your Stumbleupon Account

  • Create your Stumbleupon account. 
  • Make sure you have added all the details along with profile image, gender, date of birth, these details will help you to get more visible in StumbleUpon engine.

Download and Install StumbleUpon toolbar

StumbleUpon is a discovery engine and it recommends the best of the web, personalized just for you. Discover useful and entertaining content and information with StumbleUpon anytime, wherever you are, from any device. So get one of them :

Choose Your Topics of Interest

Now you have to specify what kind of site you owned which you would like to stumble, by selecting your topics of interest. Go to Settings > Manage Interests, browse through all the available master categories listed on the left column and among them select the topics you are interested in. Make sure you save the page before you navigate to another page!. You may select your interests upto maximum of 127 topics out of 500 topics

Connect with your friends on StumbleUpon

  • Now add more friends.
  • They will help you to get more views for your favorite or newly discovered topics. 
  • You may share your favorites easily by importing your email contacts, and also add the people who have same interests in stumbleupon, stumbleupon itself suggest you to find friends those who are having same interests to you.

Start sharing sites with other Stumblers

  • Now start sharing your favorite websites,blogs or webpages with other stumblers. 
  • StumbleUpon account make it easy for you to find friends you already know in real life, who are also on StumbleUpon.

Make New Discovers

  • Make new discovered webpages and allow stumblers to view and review it. 
  • The more people will subscribe to your favorites, more friends requests you will get and become popular there , and in future your stumbles will have potential to generate more exposure. 
  • Don't submit your links from one particular website more frequently. This may lead you to loose your community members due to get boring of your information that you keep posting

Surf Around StumbleUpon and Give Some Thumbs Up

  • Now move around with your interest and find others stumbles and like their stumbles and also make review,. this is one of the finest way to get your account more familiarize.
Note : In case you’re new to StumbleUpon, to stumble means to click the Stumble! button in your web bar or StumbleUpon browser extension to browse pictures, videos, articles, other blogs and much more that StumbleUpon recommends just for you based on your unique mix of interests, preferences, and friend.

Friday, October 14, 2011

7 Ways to Create an Adsense Account without Having a Website

Google AdSense is one of the most popular way to make money from Internet by displaying ads on your web pages. Google AdSense was launched on June 18, 2003 and today there are millions of Google AdSense publishers. Google easily approves AdSense accounts in most of countries but in few countries Google hardly approve AdSense applications. The reason is, applying for an Adsense account through low quality-content websites. If you are having a website, then you must know how to create an adsense account successfully within few hours. However, you can get an AdSense account even without owning a website.

Many people are selling AdSense account by using trick to Create AdSense account immediately. Actually there is no trick behind creating an Adsense account. They just make people fool by creating AdSense account via other websites. Other websites mean those websites who have revenue sharing system. Following are 7 websites which allows you to create an AdSense account. You don't have to pay them for this, just create an account there and apply for your AdSense account.

1- Blogger.com

Blogger.com (also known as blogspot.com) is a free blogging service from Google Inc. This is just like creating a free website on a sub-domain.Blogger gives you huge space to upload your text contents and pictures plus gives you so many templates with customization option. Just go to Blogger.com, create your blog, post some unique articles and Apply for an AdSense account through their Monetize tab.
Link: http://www.blogger.com/

2- Hubpages.com

Hubpages is a website where people post their articles and get paid out of it. Hubpages is a revenue sharing website where you can share your article on any subject and they will pay you for this. You can apply for an AdSense account via their Revenue share system.
Link: http://www.hubpages.com

3- Flixya.com

Flixya is another way to create an AdSense account. Flixya is a website to share pictures, videos and blogs and it is powered by Google AdSense itself so there are higher chances of AdSense account approval. Simply signup for an account at Flixya, upload 10 ore more pictures, create a blog and apply for an AdSense account.
Link: http://www.flixya.com

4- Docstoc

Its really simple and easy to create an AdSense via Docstoc. Go to Docstoc, upload few documents there such as txt, doc or presentation files. But make sure those files contain some well written form. Simply go to Docstoc, create an account, upload few docs and apply for an AdSense account.
Link: http://www.docstoc.com/

5- BloggerParty

This is yet another revenue sharing website. It works like Hubpages. All you have to do is create an account there, share your experience there. When you signup for an account, you will see an option to signup for Google AdSense account through them. Select that option and you will get an account successfully.
Link: http://www.bloggerparty.com/

6- IndyaRocks

This is a social network almost like Facebook. Here you can make friends, update your status, share pictures etc. First of all, create an account there and complete your profile. Write 5 blogs at least and when you have done with it simply apply for an Adsense account application.
Link: http://www.indyarocks.com/

7- Webanswers

Webanswers.com is just like Yahoo! Answers. People ask questions on various topics and others can answer this. You can get an AdSense account from this website also. Simply go to this website, post answers to some questions.
Link: http://www.webanswers.com/

Trick to Create an Adsense Account In Few Hours

Google AdSense is widely used platform to generate revenue from blogs or by publishing contents online. Unfortunaley, there are large number of people who are misusing Google AdSense. One of the popular misuse is having more than 1 Google Account and another is selling Google AdSense accounts. Google has a team of smart people, trust me, they will disable your account whenever they audited your account manually. Because of such misuses, Google has stricken their policies and people are facing problems while creating new Google adsense account. Earlier we published an article on how to get AdSense quick approve which works like a charm however here is another trick to Get Adsense account within few hours successfully.<

AdSense Account within Few Hours

Well, there is not any magic involved in this trick. It only depends on selection of right combination of various factors while applying for a Google Adsense account.
  • Create a Yahoo email address (also called Yahoo! ID) with your name such as johnsmith3445@yahoo.com
  • Signup for Blogger with same Yahoo! Email ID.
  • Create a Blogger Blog on your name i.e. http://johnsmith.blogspot.com. If Yourname is not available then add some additional number to it but must use your full name i.e. http://johnsmith3445.blogspot.com
  • Post just 3 articles about your self such as Your life in High School, How was your Yesterday, Any movie you watched etc. Write your own words instead of copying from Internet.
  • Now, its time to apply for an AdSense account - Go to Monetize tab from your blogger account and apply for an AdSense account. 
  • You will get the response from Google Adsense team within few hours.

There is not something illegal or tricky in this method so it does not violates the Google Adsense TOS at all. I wonder what makes Google Adsense team to approve such accounts with highest priority.

Friday, October 7, 2011

Customize Blogger Comment Form – Make It Attractive


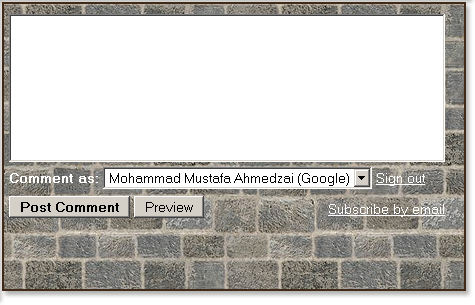
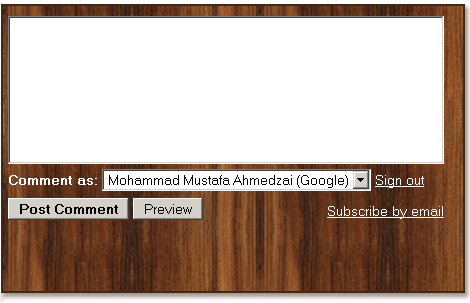
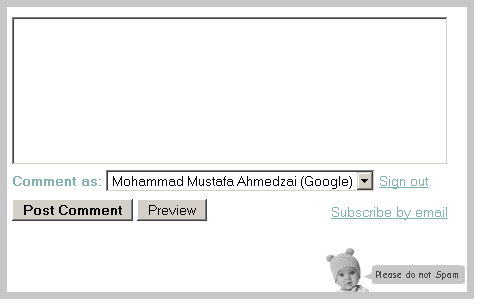
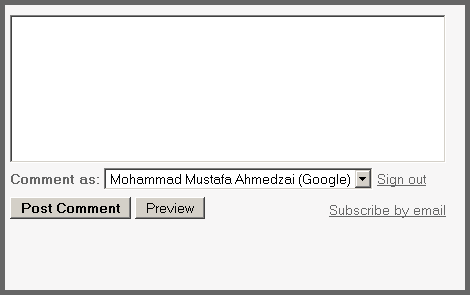
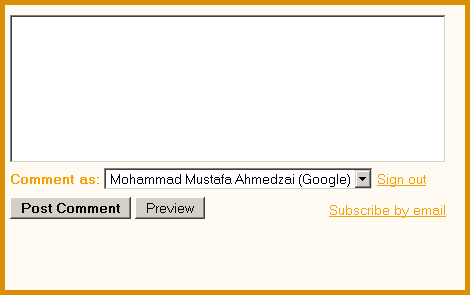
Customize-Blogger-comment-form Today's tutorial is the most demanded and most wished but rarely answered in blogosphere. For some designers customizing the Blogger Comment Form is somehow not possible whilst for others it is tricky but from today onwards InshAllah every blogger will actually be able to customize the Blogger Comment Form in the best way possible! After some trial and errors we actually succeeded in altering Blogger’s official CSS coding. We are happy to have brought you with a tutorial that will indeed enable you to have a customized Comment Form far better than that of Wordpress, Typad etc. Please have a look at some examples below,

Brick Style Comment Form

Wooden Style Comment Form


Baby Comment Form with message for spammers
Simple Comment Form with message for spammers

Orange Comment Form with message for spammers
We hope you liked this new discovery! Lets now learn how to customize the blogger comment form/box to suit your preferences.

Adding A Customized Comment Form To Your Blog

Note:- The Following CSS code is for the Comment Form With a Baby in it. Other CSS codes will be provided to subscribers only. If you haven’t subscribed yet kindly subscribe now and inform us by leaving a comment with your Email ID.
Follow these steps,
  1. Go To Blogger > Layout > Edit HTML
  2. Check The Box “Expand Widget Templates” at the top right corner.
  3. Search for the code below,                                  Tip:- Press Ctrl + f 
<div class='comment-form'>
     
     4.   Replace this code with the code below,

<div id='hws-form'>
 
     5.   Now Search for ]]></b:skin>
     6.   Just above ]]></b:skin> paste the CSS code below,

<!-- www.hackwithstyle.com customizing comment form script starts here -->
#hws-form iframe{
background:#ffffff url(https://blogger.googleusercontent.com/img/b/R29vZ2xl/AVvXsEiXC9FoWp1WUw-fk24sekjvFY8HBgsVcF7dmgKhRnRCapimZqfzJxU7ElQyLRgEMpTXeY6bscJJyhawxU3eIVJMFzBdSxjq30iDa36QISw0WEWm3ljvz0IxXWfQ0ZkB8gnk1vl4DP6QG0vK/s400/plz-do-not-spam1.gif) no-repeat bottom right;
border:7px solid #C7C7C7;
padding:5px; font:normal 12pt "ms sans serif", Arial; color:#7EB2AC; width:450px; }
#hws-form iframe:hover{
background:#ffffff url(https://blogger.googleusercontent.com/img/b/R29vZ2xl/AVvXsEgXXrS25ieJ_MEWy0pzmWmFRAXol5AxmwWRJySRV3GtOcVFB0ufjvSFrI28MNGTc9YCdhz3yPswVVKFKqVdoGyXf0R7KGt4bkIdbnfAIFw2hhqw0dKdM6FFshJhcF3TLlOn5HuSu0yffA9-/s400/plz-do-not-spam2.gif) no-repeat bottom right; border:7px solid #7EB2AC;
}
#hws-form a{
color:#7EB2AC;
}
    
7.     Save your template and view your blog to see a different touch :>

Customize The Blogger Comment Form To Suit Your Blog Layout

Now Lets discuss the important areas in the CSS code above to help you customize your Blogger comment form according to your preferences.
There are three important areas, which are,

#hws-form iframe
#hws-form iframe:hover
#hws-form a
 
Here are the details for each section

1.    Customization For Active Mode
 
#hws-form iframe
 
This part is responsible for the active appearance of comment box when mouse cursor is not hovered on it. It includes the following style properties,
background: This property is responsible for the background color, background image and background image’s position. Where,
  • #ffffff : This is the background color. You can change it using our Color Chart
  • url : This is the URL for the background image. I used the baby in this case. You can change this image with anything you like.
  • bottom right: This positions the background image. I positioned the baby on bottom right corner. You can position the image at bottom right or bottom left or top right or top left
border: This CSS property defines the border size/width, style and color of the comment box. I have set these values for the Comment form in active mode(not on mouse over),
  • border size to 7px,
  • border style to solid. You can choose solid, dotted, dashed etc. See this page on border styles
  • border color to  #C7C7C7. Use our CSS Color Chart for using a different color.
padding: This CSS property is responsible for the distance/gap between the Comment Form border and its text area. You can increase this value if you wish to insert an image at top right or top left corner of the form.
font:  This CSS property defines the boldness, font family and the size of the text. I have set the following for the text “Comment as:”
  • boldness to normal,
  • size to 12pt 
  • font family to  "ms sans serif". If in case the browser doesn’t has the "ms sans serif" font then I have set Arial as a backup.
color: This property defines the color of the text “Comment as:” . Use our Color Chart for changing the text color.
width: This property sets the width of your Comment Form. You can see the comment from of my blog is wider than normal because I have adjusted its width. Set the width of your comment form a bit smaller than that of your post width. You can find your post width by finding the following code in your template (Edit HTML)
.post

2.  Customization For Mouse Hover Mode Now lets discuss the CSS properties for the form’s appearance when a mouse cursor is hovered on it.

#hws-form iframe:hover
 
It has almost the same explanations for background and border as we discussed earlier. Setting these two CSS properties will effect the second image only that appears on mouse hover.

3. Customization For The Link Colors
 
#hws-form a
 
This part defines the color of these two links -> “Sign out” and “Subscribe by email” . These links appear at bottom right corner of every Blogger Comment Form.
color: This sets the link color. Set a link color as contrast to the background color.

That’s All!
I hope this tutorial will be of great help to bloggers and designers. We request everyone to kindly link back if you wish to share this unique tutorial with your readers and friends. We thank you for your patience.
Any question is welcomed :>

Wednesday, September 28, 2011

Chapter 4 : Widgets and Add-ons essential for blogger

Hello guys hope you all are fine and enjoying good health , Sorry for the delay of this chapter actually I was very busy in job and also in my hostel allotment as I have told about it on facebook . Well now I get time to write this chapter. In the previous chapters . In the previous chapters I have told you how to Setup a new Blog and also about How to choose an attractive template for blogger and in the recent chapter we learnt about How to Make Your Blog Post Attractive . Now in this chapter I will told you about the Widgets and adddons that are essential for the bloggers . I will try to tell you guys all the widgets I am using but still if you want to add any other widget and want to know how to add that widget then can ask in the comments.

List of Widgets


Following are the few widgets which I am using and I will recommend all the bloggers to use them as they are best for blogs :

Multi Tab Widget


Add Banner Widget


  • This one is also a great widget . I am not using it rite now but will use it in future.


  • I will recommned you to use it when you have enough traffic and other sites are find you worth enough to add their sites.


  • Its also a good source of earning for you.


  • Add 125 by 125 Add Banner to your blog .


Email Subscription form


  • Email Subscription is the most essential tool for bloggers because its a constant source of earning for you.


  • As much email subscribers you have ,so the traffic to your blog will increase .


  • So add a cool subscription form to your blog and it must be easily visible so that visitors can add their emails very easily.


  • Add a subsription option under each post which I have explained in previous post and also add a widget on your sidebar.


  • Add a cool Subsription form to your sidebar and enjoy the traffic .


Feed Subscription Form


  • This is also an other way to increase your traffic and the best way to attract other visitors.


  • If you have 500+ feed subscribers,it means you are doig a fabolous job.


  • Others sites ads cost also depends on it . When someone is willing to pay you for their ads then he must first check your feed subscribers.


  • Add a cool feed Icon to your Blog and enjoy traffic.


Add a Footer Column


  • As I have explained in my previous chapter that adding footer is very essential for the blog .


  • It increases the beeauty of your blog and also you can add many addons in it .


  • First try to get a template having footer but you have some blog without footer then herez the way to add a Customized Three Column Footer widget to your Blog .


Recent Post and Recent Column


Bookmarking Sites Widget


  • If you find some beautiful Bookmarking widgets then must add them to your blog.


  • Its a good way to get backlinks from these sites and also a lot of traffic.


  • I have posted about Twitter Recent Post Widget for Bloggers .


  • If you want to add any other widget and need help then ask in the comments .


Enough for today , hope I have helped you guys in some ways and I am waiting for the response about howz your blog looks after adding these widgets .... :))


A25UBXF9XS7W

Thursday, September 15, 2011

Free Essential Tools for Blogger Blogs

Which are the best Blogger tools? Blogger has a simple and fine interface that takes care of many things for you. This is my suggestion to you for your first free essential must haves for your blog.
Free Blogger tools


  • Feedburner - It generates an smart feed compatible with all feed readers for free like my feed. It allows you to put easy subscribe buttons for XML, Add to yahoo, Add to Newsgator, Add to MSN etc. Read about how their single feed policy can benefit you.
    It can give you a cool feed count chicklet button to show how many readers are using your feed to read your blog. It also gives you a headline animator which you can attach to your blog to display the recent 5 posts in a nice animated fashion. You can get an authentic Creative Common license, get a browser friendly RSS feed, Splice photos and links and more…

  • Haloscan – Trackback is an essential component of blogging these days. Unfortunately Blogger does not have trackback. Haloscan provides you with a seamless way to integrate free trackback in your blog by adding a small code. You can also integrate their comments component if you like to replace the Blogger comments. Read about Haloscan or Blogger comments.
    The benefits are that you can edit Haloscan comments, and open them in a pop up and keep them separate from your post (Blogger allows you to only delete comments and not edit them, also on the post page all comments will show whether you like it or not).
    The main disadvantage is it will not email you these comments (like Blogger) for free and it is difficult to track where these comments were made. Another major benefit is that it allows you to send pings and trackback to other sites when you mention about them in your posts.

  • Imageshack – Dont you want to fill your blog with images without hassles of registration. Imageshack provides an excellent interface to take care of your free image hosting needs. Maybe it is this the fastest way to host an image on the web. Allows lots of image format, hotlinking, transloading from other sites. Its a good idea to register to keep track of all your images in one place. It is much convenient than the proposed Hello and Picassa options… [Update: Blogger enabled hosting of images on its own webspace making it easier to host images in your posts. But you cannot manage or edit / delete your blogger images in any way

  • Technorati - Create and add a technorati profile. It allows you to claim your blog in this huge blogosphere. It allows you to put an excellent technorati search on your blog. The best part is that whenever someone mentions or links to any page of your blog, technorati knows and a search for your blog on technorati shows exactly how many sites link to which pages of your blog and when they were added with a small description. See why you need a technorati account.

  • Sitemeter – Just takes 5 minutes to get a free tracker which gives you realtime site traffic statistics to check the quantity and quality of your site traffic with detailed referrer and geographic data. I have checked out several other tracking sites, but this one seems the best. Although you need to keep a counter visible (as a logo, visitor counter) and the statistics can be made private too.
    StatCounter gives much more detailed statistics and the counter is totally invisible and free totally till you start getting large traffic, when you need to pay. But the disadvantage is that both of these track the last 100 visitors only, while another free service Extreme Tracking tracks them all… but you statistics cannot be made private. More options I like are Google Analytics for deep traffic statistical analysis and it is hidden too.

  • Feedblitz – It quickly allows your blog visitors to subscribe by email to your new posts. They just have to enter their email. You decide which page opens after they press Subscribe. A quick confirmatory email to them and they get 1 email daily with all your new posts. You can decide if you want to send the full post or short posts with defined number of characters. Very good to keep your subscribers informed of new posts. It allows them to unsubscribe easily also. Example for our blog.

  • w.bloggar – It is a Post and Template editor, with several features and resources that the browser based blog editors do not offer. It enables users to have only one interface to several accounts hosted on several different sites, using different publishing systems. Helps to manage multiple blogs on Blogger very effectively.

  • Blogger Mobile – opens a new concept of Moblogging i.e. blogging by your mobile phone. When you send text or photos from your mobile device to go@blogger.com they’re automatically posted to your new blog page.

  • Blogexplosion – helps you get confirmed traffic to your blog. The principle is simple, you visit other peoples blogs and they visit yours. For every 2 blogs you visit, one visitor comes to you. This is very good if you are new blogger and have hardly any traffic. Definitely try the Rent a Blog advertising swap service.

  • Pingoat – Pinging lets dozens of blogging services know you’ve updated your site and increases traffic to your blog. Just enter your blog name and blog home page, check the blogging services you want to ping, just click ‘Submit Pings’ and in one click it pings all of them. Pingoat offers a wide variety of such services and is fast too. See many more one click pinging services.

  • Creative Commons – It offers a flexible range of protections and freedoms for authors and artists. They have built upon the “all rights reserved” of traditional copyright to create a voluntary “some rights reserved” copyright. They are nonprofit and all tools are free and useful to highlight the way in which you want others to use you content.

  • Google Adsense and Search – When you take all effort to write for a blog, why not optimize it to make some money. Let users search for good posts in your blog. And now it even helps to monetize you feeds.

8REKFFNFN6F2

Sunday, September 11, 2011

Chapter 3: Make your Blog Post Attractive

Hello guys hope you all are fine and enjoying good health. In our previous chapter ,we learned How to set up a new blog and also How to choose an attractive template for blogger. Now we are perfect with our blog's external body ( we will discuss widgets latter ) , now we come towards the posts of the blog . Now you are in a position to start posting on your blog. While posting on your blog keep these things in your mind :

Important Points for Writing Posts


Read all these points carefully and if you got any problem simply ask in comments. I have tried my best to make them simple .

1) Be unique in your postings


  • Never used a copy material , always try to post your own material.
  • If you find some article intresting and you want to post it on your blog then before posting edit it .Like you have seen my posts ,I have my own writing style and you can judge it very easily.
  • Before starting a post use some greetings and make your attitude like you are well known to the reader as you can in this chapter I have written a greeting just check the start of this chapter. It makes the reader to feel the blog is genuine and the material on it is not just copy paste. Hope you guys getting my point.

2) Style of  Post Body


  • Make the style of your post unique like there is just one font and color for your blog headings .All your headings must be of same style,font and color.As you can see in this blog I am using sky blue color for all my headings with upper and lower dotted lines.Customize your Heading Style in Blogger and Wordpress.
  • Similarly ,if you want to post any link in your post then choose a color for it too, like if you see in this blog I am using the same color for my links.
  • These two things bring a regularity in your post and attracts the visitor most.
  • Make the bullets unique as you can see all my bullets are two arrows,it increases the attractiveness of your post and again the colour of bullets must be the same as your heeding color or link color. Customize Bullet List Style In Blogger With Image Hover
  • If you want to add some html coding in your posts then again give it a style.Will post about it if anyone asks about it as its not so difficult .
 Thats all for this section ,having any problem you can ask in the comments.

3) Bookmarking Icons in the Post


  • Must add bookmarking buttons on your posts as it helps in promotion of your post. but on the same side dont add huge number of icons it makes everything messy.
  • Just add them on the top and at the bottom of your posts and try to give them an attractive style like hover up etc.
  • Must add a subscription option at the end of post as it increases the visitor. More the members subscribe to your blog more will be the visitors.
Thanks guys for reading this. I tried my best to make it as simple as i can and still if you guys having any problem then ask in the comments and also +1 this post to return me some favor for my efforts :))

Customize your Heading Style in Blogger and Wordpress

Change-heading-style You must have observed the style of headings in my posts, it’s usually surrounded by two sky blue borders and have a text colour in sky blue. Styling the Headings gives an interesting and attractive look to your blog content. Readers find it more easy to locate a certain portion of your topic with the help of properly customized Headings. Further it will increase your search engine ranking because heading tags produces a really good impression on search engine robots. This tutorial is mainly for Blogspot users but some interesting styling can surely be added to Wordpress. Lets Start!


Customizing Heading Style Using Simple CSS – For Blogspot Users

I have six different Heading styles for you guys. Have a look at the video below,
Now to add one of the above Heading Style to your blogs, do the following,
  1. Go To Blogger > Layout > Edit HTML
  2. Search For ]]></b:skin>                  (Tip:- Press Ctrl + F )
  3. Just above ]]></b:skin> paste one of the codes below,
  • For Heading Style with a bottom border, use this code,
.post h4{
color:#0080ff;
border-bottom:1px solid #289728;
font-size: 12pt;
padding:2px;
}
  • For Heading Style with a border at top and bottom, use this code,
.post h4{
color:#0080ff;
border-top:1px solid #289728;
border-bottom:1px solid #289728;
font-size: 12pt;
padding:3px;
}
  • For Heading Style surrounded by borders, use this code,
.post h4{
color:#0080ff;
border:1px solid #289728;
font-size: 12pt;
padding:2px;
}
  • For Heading Style with Hover Effect, use this code,
.post h4{
color:#0080ff;
border-top:1px dotted #289728;
border-bottom:1px dotted #289728;
font-size: 12pt;
}
.post h4:hover{
border-top:1px dotted #0080ff;
border-bottom:1px dotted #0080ff;
background-color: #289728;
color:#fff;
}
  • For Heading Style surrounded by a Box, use this code,
.post h4 {
border-bottom: 1px solid #289728;
color:#0080ff;
font-size:12pt;
}
.post h4 span {
position: relative;
left: -0.3em;
bottom: -0.6em;
padding: 1px 0.5em;
margin: 0;
border: 1px solid #289728;
background-color: #fff;
}
  • For Heading Style with a side Image & Hover Effect, use this code,
.post h4 {
background: #fff url(URL OF Side Image) top left repeat-y;
font-size: 12pt; 
color: #0090ff;
padding:28px 0 0 44px ;
}
.post h4:hover {
color: #289728;
}
Make Sure you replace URL OF Side Image with Image Link of your preferred side image. This image can be 45px by 45px in size or even smaller. I have used the following image in the video above –>
    
        4.     Now Finally save your template.

Customization and Implementation Of The CSS Code For Headings

Customization:-
All the CSS codes above use simple properties which are described below,
1.   For Changing border width, style and colour edit codes like this one,


border:1px solid #0080ff
 

Here 1px refers to border thickness/width and solid refers to border style and the six digit number refers to border colour. You can change border style from solid to dotted or dashed. I like border style to be dotted because it gives a light appearance.
You can use our CSS Colour Chart for getting the six digit number for your desired colour
 

2.    For Changing Font Size, edit codes like this one,
font-size:12pt 
If you want the text size to increase or decrease than respectively increase or decrease this value 12pt
 

3.    To Change Font Colour, edit similar codes like this one,
color:#0080ff
You can use our CSS Colour Chart for getting the six digit number for your desired colour  


Implementation:-
 

Now Whenever you write a heading in your post inside blogger editor, simply add the following pieces of codes next to your heading,

<h4> Your Heading Goes Here </h4>
See a screen shot below,
example-image-for-heading-style
This can be done both in compose or HTML mode.
For Heading Style Surrounded By a Box you will need to add slightly different code as shown below,
<h4><span> Your Heading Goes Here </span></h4>
We only need to add an extra span tag (i.e:- <span>) for the box to appear.
That’s All!
Note:- Changes Will Not Appear inside Blogger Editor or on previewing. You will only see a bolded black text inside blogger editor. The styling will take effect only when the post is published.

Customizing Heading Style Using Simple CSS – For Wordpress Users

To be honest I really hate wordpress because it has nothing interesting for new web designers like me. It uses complex php script that few understands and also has a complex CSS editing option that has never went through my throat. If you are an expert wordpress user then you can use the blogspot method above to style headings in your wordpress template but if you find it difficult to edit wordpress style sheet like me then you can adopt a simple way as described below.
We can only apply three out of six Heading style methods to wordpress which are,
  1. Heading Style with a bottom border
  2. Heading Style with a bottom border and top border
  3. Heading Style surrounded by borders
To apply any of the heading style above, do this in your Wordpress Editor,
  1. In the visual mode of your Wordpress editor first write a heading
  2. Now switch to the HTML mode and enclose your heading with the following code,
  • For Heading style with a bottom border, use this code,
<h4><div style="color:#0080ff; border-bottom:1px solid #289728;
font-size: 12pt; padding:2px;">Your Heading Goes Here</div></h4>
  • For Heading style with a bottom border and top, use this code,
<h4><div style="color:#0080ff; border-top:1px solid #289728;
border-bottom:1px solid #289728; font-size: 12pt; padding:3px;">Your Heading Goes Here</div></h4>
  • For Heading style surrounded by borders, use this code,
<h4><div style="color:#0080ff; border:1px solid #289728; font-size: 12pt; padding:2px;">Your Heading Goes Here</div></h4>
The green text is where your heading must lie and the bolded black text is the code that should surround your heading. Now once you have added the codes correctly, simply switch to the visual mode and you will see the heading style in action! See some screen shots below for heading style surrounded by borders,
First enclose your heading with html codes above in the html mode,
wordpress-editor---html-mod

Then press the visual button to see the effect live!
wordpress-editor--visual-mo
To customize the styles read the customization guide for blogspot users
Hope it was clear :>>

Tuesday, September 6, 2011

Chapter 2 : How to choose an attractive template for blogger

Hello guys , sorry for the late post busy in some personel work.Well in the previous chapter named Setting up a new blog we have learned how to create a new blog but just creating a new blog is not sufficient to get visitor , there are some specific techniques which are very essential for the blogger owner to attract the traffic.The blog should be very attractive so that visitor think that he is on some valueable site. In this chapter we will learn how to change our template and what are the things we should kept in mind while choosing our template . Hope you guys like this chapter so lets start it.


Choosing a Template


First of all search on the web and download some cool template for your blog because the default templates provided by the blogger are very basic and useless. Make your blog as much attractive as you can . Now how to download templates :
  • Go to google and write blogger templates 2011 and you will get a lot of cool blogger templates.
  • Be careful in choosing template for your blog and once choosed then stick with it , changing template again and again makes a very bad impact and your regular readers just go away.

What things should be kept in mind ?


Now the question arises that what things should be kept it mind while choosing template. I have changed my template many times because after some days i found some technical mistake in my blog but now I am fully satisfied and will not change my template again . Some keep these things in mind ehilw choosing your template :
  • The background color of your blog posts must be white . Its a human psychology that he likes bright thing and a bright background compel the visitor to read the post.
  • There are many templates with two columns or three columns and i have also seen few templates with four columns .But I will prefer two column template . .In two column there is more space for the posts and the reader can easily read the post.
  • Choose a template with footer because a cool footer increases your blog attraction.Atleast I think so.
  • This is very important point never ever choose a template having many widgets on its home page . Make your homepage as simple as you can . I have seen many friends blog where on their home page there are lots of bookmarking buttons , tweet bird , floating feedback button etc . Simply avoid them . Again forcing on it try to make your blog as simple as you can.
  • Template must have a drop down menu tab .

How to change template in blogger ?


  • Now once you have choosed your template then save it on your deskyop . Its usually a xml file.
  • Now sign in to your blogger account .
  • Now go to Dashboard > Layout > Edit HTML > Browse
  • Choose saved template from your hard disk and click Upload.
  • This will give you warning for widgets to be deleted.
  • Then you can continue with save template.
  • Your new template is installed , so view your blog and check it.

Last Few Words


So now search on google for an appropriate blogger template while keeping these things in your mind . Moreover if you are unable to find the best template dont worry as in our furthur chapters I will teach you how to add footer etc in your blog if they are not already installed.

  • I have my own collection of templates around 20-30 blogger templates which i like most so if any one of you want to get those templates then simply post your emails below in the comments and I will email those templates to you guys . 
  • One advantage of using those templates is that I can easily resolve your problems as I know all the html coding of those templates .
Note: If you guys have any problem at any point simply ask in the comments ,I will try my best to solve your problem , and also give your feedback about this chapter .

Monday, September 5, 2011

Blogger’s fresh new look

As you may have heard, things are starting to look a little different across many Google products—and today, Blogger is the next product to get a makeover.

It’s been a few years since we made major updates to Blogger’s look and feel, and there’s a lot more to these changes than just shiny new graphics. We’ve rewritten the entire editing and management experience from scratch so it’s faster and more efficient for you—and easier for us to update and improve over time.

Throughout the design process, we conducted user interviews to help identify how to make Blogger even easier and more enjoyable to use. We also watched users try our new interface and made many refinements based on their feedback.

A streamlined blogging experience


Whether you’re on a dashboard or settings page of blogger.com, you can always create or edit posts with just one click at the top of the screen. Additionally, the post editor has been expanded and simplified to give you a larger canvas for drafting and previewing your work.


Monitor and grow your audience at a glance


In the new “Overview” section of your dashboard, you’ll be able to quickly get a pulse for how people are reacting to your blog with a graph of your most recent traffic numbers, comment activity and follower counts. For extra guidance and inspiration, you’ll also find a list of helpful links, a feed of Blogger updates and a showcase of other blogs you may find interesting.

Opt in now

Starting today, we’ll gradually let all bloggers choose to turn on the new UI, so your Blogger experience won’t be updated until you enable it. Over the next few days, keep an eye out for a pop-up announcement on your dashboard with instructions on how to get started, and check out this Blogger Help Center page to learn more about what’s changed.

If you have suggestions or feedback about the new look, click the gear icon in the top right of the navigation bar and select “Send Feedback.”

We’re working hard to fundamentally revamp and improve the Blogger experience from the ground up, and we hope you enjoy the first in a series of major updates that are on their way in the coming months.

Google Plus template for Bloggers

Google Plus project started few weeks back. I just saw few WordPress templates getting released, so I thought to release its Blogger version. Well, personally I really love the design of Google Plus and thinking of re-designing my blog giving it a bit of look same as Google Plus but may be later. Check out the screenshot below of the latest Google Plus Blogger Template.

G+ Template Screenshot, Demo & Download link

Demo | Download

Important Instructions

  • If you want to change the logo, open template source code and search for “https://blogger.googleusercontent.com/img/b/R29vZ2xl/AVvXsEi9Id1bn04OWYaM2IVU_VoyQIYQ0qCRzimDSvIpZt-TDCjlLb7qkPJ92MKm2uy_HOre6Fqdy-CZrLGrUtho4ZhVJgNAIO8S-tPVsZwTECp1_zL_drmiGY-SsD0IHQf7cPM7Fs_73F9ZRU8/s320/google-logo-plus-0fbe8f0119f4a902429a5991af5db563.png” and replace this image link with you own logo but remember the size should be same.
  • There are four menu option but beside the logo, by default I’ve given some links, if you want to change it, you have to do it manually. Search for
    > and you can make the changes there.
  • At top there is option to add Pages that are added automatically.

How to cross post from google plus to blogger or blogspot.com automatically?

Want to cross post from your google plus to your blogger or blogspot blog automatically?

Almost everyone of us blog. Some have their own blog using wordpress hosted on their own servers. But not everyone is technical. When blogger or blogspot.com launched, it was a God send which turned almost anyone from technical to non-technical to an instant blogger. It was so easy to just create an account and just start blogging without worrying about anything.

Now let’s get to purpose of this article. We post and share a lot’s of stuff from our Google Plus account and sometimes we want to post some of them on our personal blogspot account. Copying and pasting them onto our blogs takes time and redundant. Here is a easy way to cross post your google plus posts automatically to your blogspot blog.

  • Login into your blogspot.com account
  • Click on the settings link on the blog you wish to cross post
  • Click on the Email & Mobile Tab
  • Under Posting Options, Enter a value for the Email Posting Address (Keep this secret and don’t share with anyone) It looks like this username.yourvalue@blogger.com
  • Leave the default values and click on Save Settings button
  • Now goto your google plus account
  • Click on the Circles button on the top
  • Create a new circle
  • In the new circle dialog, enter a name for the circle e.g Blogger and click on Add a New Person link
  • Enter the email address you created above from blogger or blogspot.com
  • Click on the Create circle with 1 person button
  • Now whenever you share a news, link, video, etc.., just add the above Blogger circle you created
  • The content you share will be automatically posted to your blogger or blogspot account

Twitter Delicious Facebook Digg Stumbleupon Favorites More


Recent Posts

Join Me On Facebook

700+ Followers

Followers


meet women in Ukraine contatore visite website counter
DMCA.com

Recent Comments

Follow Me On Twitter

1112+ Followers